Read this in:
 اردو (Urdu)
I always thought of Valentine’s day as an excuse for Capitalization of an obscure ritual, evidenced by the overpriced roses and chocolates on sale. I do not recall celebrating it as a formal thing at all!
But then kids happened and I realized there is an entire world of crafting supplies to be explored. I kinda overdid it on the DIY-extreme first birthday party for my older one. Of course, this was back when you could have parties (seems like eons ago). But the crafting only got bigger and (I hope) better with time۔

As a result of that, I was left with a whole lot of scraps over the years and realized that I could use them for making some other crafts that the kids would enjoy.
This Valentine’s day, I was able to dig into my stash and came up with these sugar-free activities. These took the least amount of time, resources and left the least amount of mess with two kids helping. The end-product was super-adorable too.
This post contains affiliate links and if you make a purchase I receive a small commission at no extra cost to you. Full disclosure is in the privacy policy (scroll down to read)
In no particular order, here is the first one:
Rainbow heart crayons
Now if you have a child at home, you must have a bajillion of these broken crayons in a bin or drawer somewhere in your house.
This activity will finally give them the Valentine’s day makeover they desperately need.

What you will need is
- said crayons (ask your kids to dig them up for you)
- silicone baking molds in the shape of your choice. (recommended link)
- an oven
- that’s it
So step one is super fun (and kind of satisfying too). All you have to do is take off the wrappers from crayons and then break them into small pieces to fill the mold. Feel free to use your minions.
Preheat your oven to 225 Fahrenheit.
Place the mold (supported by a cookie sheet) inside the oven.
Once all the crayons have turned to liquid, (took about 20 minutes for the big one) take them out and let them cool completely.
Lastly, ask your kids to pop them out. They will ooh and aah at the beautiful marbling effect and will probably argue over which one is the best.
Party tip: These would also make great party favors or Eid gifts for family. Just find a mold that would go with the occasion and wrap them in some parchment or tissue paper with twine.
Reusable no-sew Valentine’s day tic-tac-toe
I had some leftover fleece from the time I made a sleeping bag for my daughter (ages ago). I loved the fabric and the color. Turns out this project was made for my scrap fabric.
You can make this out of any fabric but if it is a fabric that will fray, you need to seal that with some glue first. or sew it (which will require more effort but you do you!)
Since fleece and felt both fabrics do not fray, you just need to cut for this one.

All you need for this one:
- Assorted pieces of fleece or felt (recommended link)
- Scissors for cutting fabric
- Permanent marker
- Ruler
- Ribbon

Now one thing I didn’t mention is a paper punch. I had one that could cut heart shape confetti and I used that to make a template for the tiny hearts. But you do not need one. I will show you another way to make hearts.
First, fold the big piece of fabric (fleece or felt) into half length-wise.
Draw half a heart shape on it and cut the folded piece so you will end up with a perfectly symmetrical heart when you unfold it.
Use the ruler and marker to draw the grid shape. I used the width of my ruler as a guide.

For the small hearts, (to make it Valentine’s day worthy) use two different types or colors of felt. Fold one side and cut the heart shapes out.
You will need 5 small hearts of one color and 5 more of a different color so the players can choose their piece. I used some faux leather in a rose gold (link here)
Finally, you can just place all of the hearts inside the big heart and roll it up. Secure with a ribbon or twine.
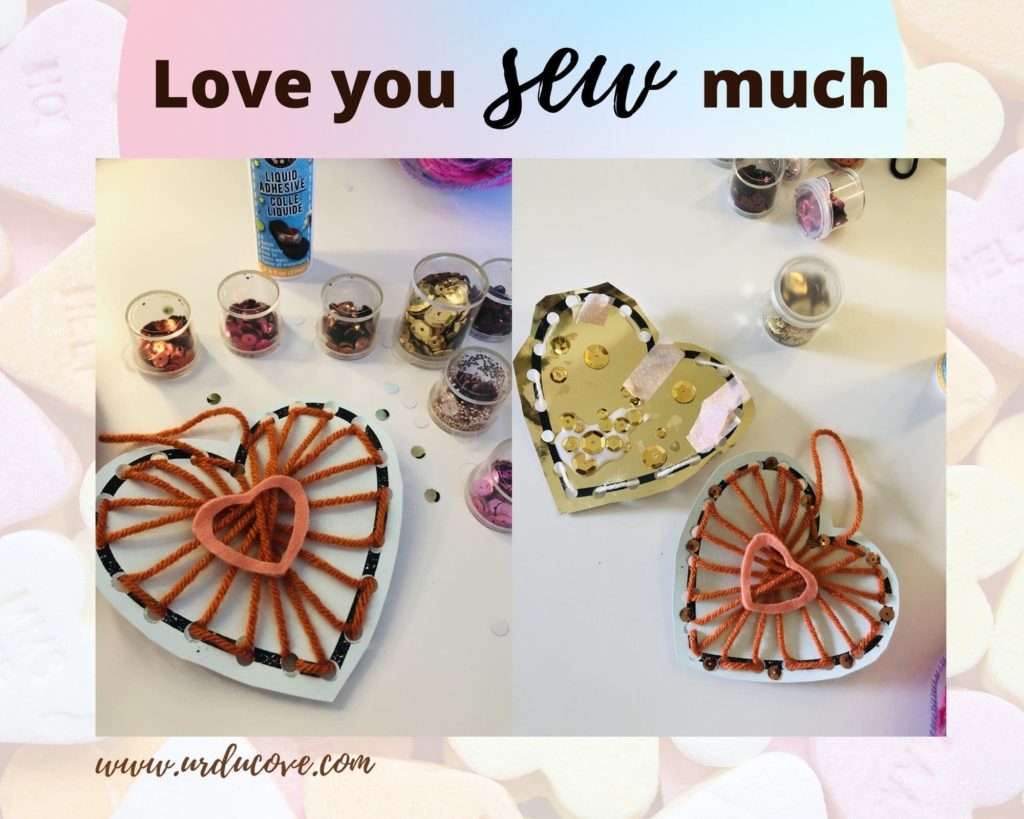
Love you sew much craft for Valentine’s day
This is a great Montessori-inspired activity for little hands to practice their fine motor skills.
You can use this template to cut out an outline of the heart shape.
For this one, you will need:
- Some colored paper, paper plate, or cardstock. (link here)
- Template (optional)
- A small hole punch or needle to make holes
- Yarn or embroidery thread
- Piece of tape
First, you will need to trace a heart shape on the piece of paper/ cardstock or paperplate.
Next, you will use the hole punch to place fairly equi-distance holes all around it.
Then. cover one end of the yarn with the tape to make it easy to weave.

Weave a pattern you like. You can choose to go across, diagonally or criss-cross.
When finished, you can decorate it as you like. As you can see I may have a slight sequin obsession.
My daughter clearly has no limits on the bling factor. I decided to make a loop out of my yarn to hang it. I loved how these Valentine’s day hearts turned out.

Those were the activities we enjoyed and these activities helped me recycle a bunch of thing too which is a bonus. Let me know your thoughts about the V-day activities and which one of these did you like the most.
Read this in:
 اردو (Urdu)


Awesome activities. I can’t wait to try them all.